Dify + OceanBase + MCP: A Trio That Makes Building RAG Applications Easy
About the author: Cheng Zhiwei, OceanBase evangelist and translator of Elasticsearch in Action (2nd Edition).
In the field of AI application development, Retrieval-Augmented Generation (RAG) has become a core technology for building scenarios such as intelligent Q&A and document analysis. Through RAG, an AI application can combine an existing knowledge base and incorporate external information when generating answers, thereby providing users with more accurate and intelligent responses.
Through a hands-on case study, this article will show how to use OceanBase, Dify, and MCP to build a fully functional RAG application from scratch.
Dify is an open source LLM application development platform. It provides a friendly graphical interface that lets developers quickly orchestrate and deploy AI applications and workflows.
OceanBase is a self-developed, open source distributed relational database, purpose-built for large-scale data processing, high-concurrency access, and financial-grade availability scenarios. It supports not only traditional structured data management and transaction processing, but—starting from version 4.3.3—also natively supports vector data types, meeting the needs of emerging applications such as AI and semantic search.
MCP (Model Context Protocol) is an open protocol launched and open-sourced by Anthropic in November 2024, designed to enable efficient interaction between large language models (LLMs) and external tools and data sources. Through a standardized interface, MCP lets AI systems access and call databases, APIs, and other services in real time, breaking down “data silos” and improving the real-time responsiveness, operability, and collaboration of AI applications.
Deploying OceanBase
OceanBase offers multiple deployment methods, such as via Docker, Kubernetes, OBD (OceanBase Deployer), and OceanBase Desktop. For convenience in this experiment, we’ll use OceanBase Desktop to deploy OceanBase.
Note: OceanBase Desktop is only for learning or testing scenarios; please do not use it in production.
To install OceanBase Desktop, refer to this document: https://www.oceanbase.com/docs/common-oceanbase-database-cn-1000000002866370
Once OceanBase Desktop is installed, you’ll see the following interface:
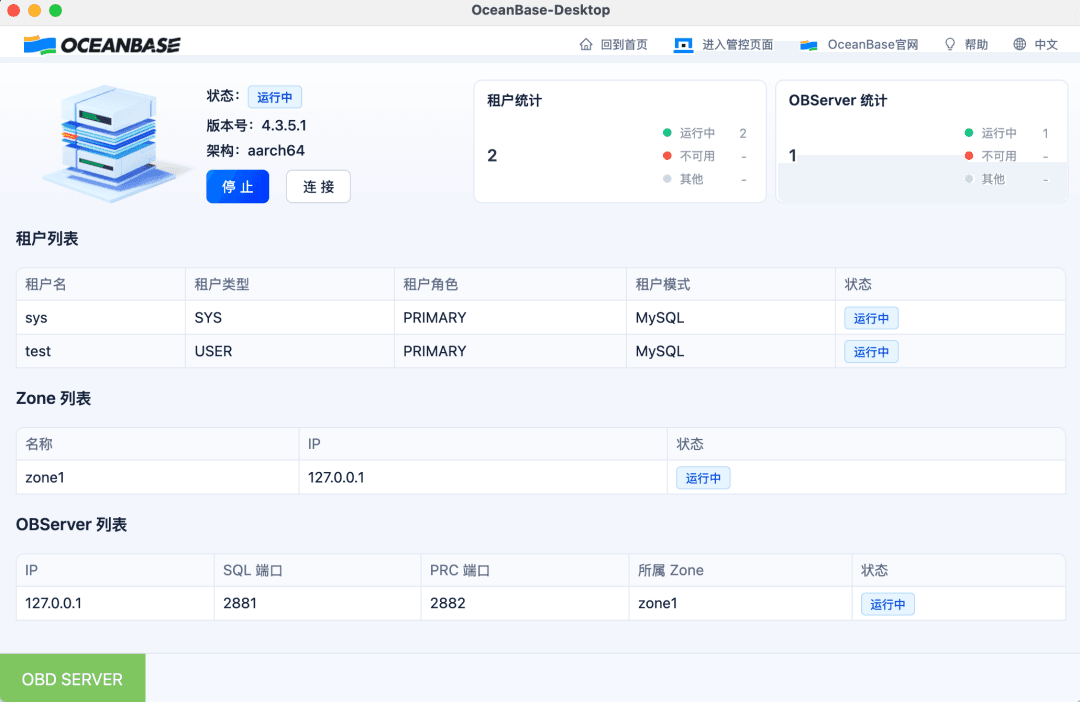
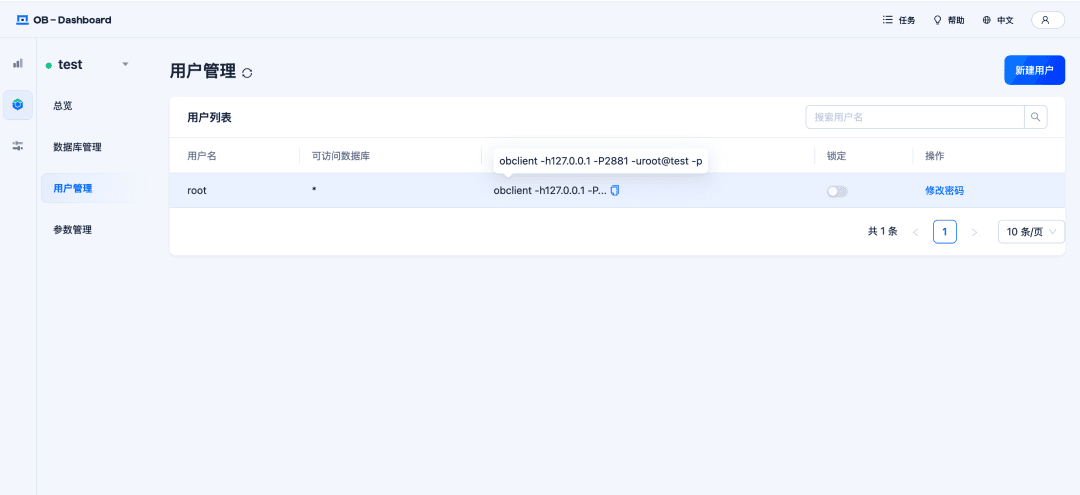
By default, OceanBase creates two tenants, sys and test. We’ll create the vector database that Dify uses under the test tenant. The first time, you need to set a password for the test tenant.
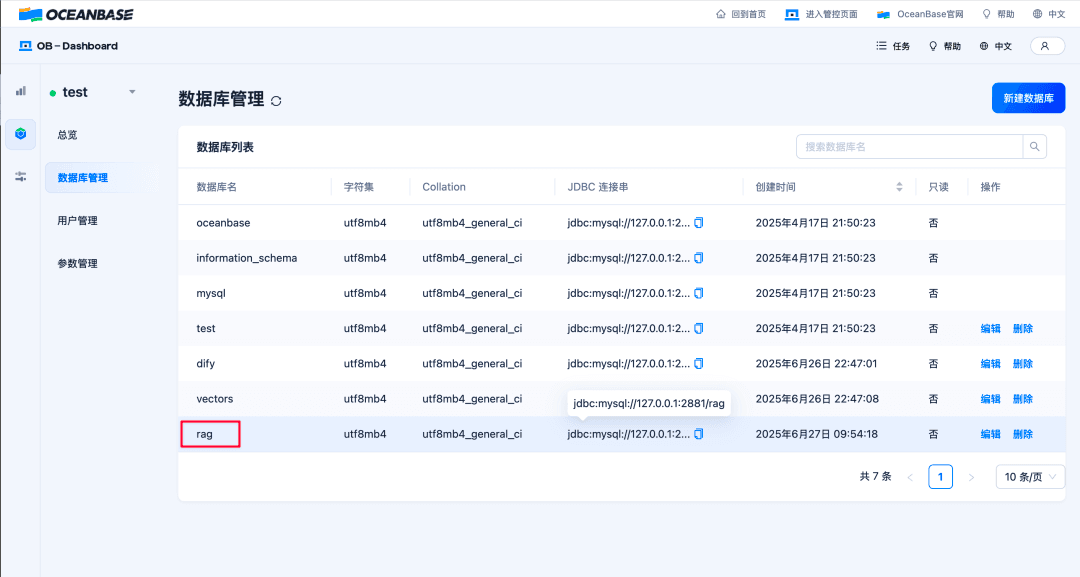
On the Database Management page, add a new database named rag.
Deploying Dify
In this article, we’ll use OceanBase as Dify’s vector database, to store the knowledge base content the RAG application needs. At the same time, Dify also needs a relational database to store metadata. Currently, the official Dify repository (latest version v1.5.0) supports only PostgreSQL and does not yet support MySQL.
The OceanBase community modified Dify based on the v0.14.2 branch to support storing structured data in a MySQL-protocol-compatible database; the related code and documentation are in the oceanbase-devhub/dify repository. If you want to use OceanBase as both the vector database and the relational database, you can refer to that version for deployment.
The OceanBase community previously submitted a PR to the official Dify project to support MySQL (Make Dify compatible with MySQL database: https://github.com/langgenius/dify/pull/8364 ), but that PR was not adopted by the Dify community. In order to use Dify’s latest features (such as the MCP Server plugin), this article will be based on the official latest v1.5.0 version, using OceanBase and PostgreSQL as the vector database and the relational database respectively.
The simplest way to start the Dify server is via Docker Compose. First, clone the Dify repository. Go into Dify’s docker directory and copy the environment variable configuration file.
1 | git clone https://github.com/langgenius/dify.git |
Then, edit the .env file, set VECTOR_STORE to oceanbase, and fill in OceanBase’s connection information.
1 | VECTOR_STORE=oceanbase |
You can get OceanBase’s IP address from the virtual machine used by the OceanBase Desktop deployment. On macOS, OceanBase Desktop is deployed by launching a virtual machine through OrbStack. You can enter the corresponding virtual machine by clicking the Terminal button on OrbStack’s Machines page, and view its IP address with the ip addr command.
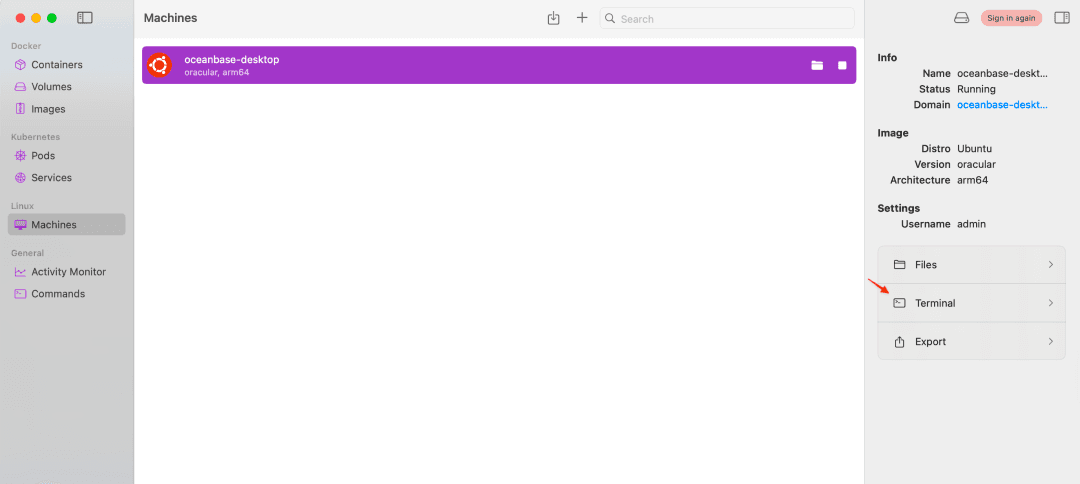
In the output, find the inet address of the eth0 network interface—for example, 198.19.249.160—which is the IP you need to connect to OceanBase.
1 | admin@oceanbase-desktop:~$ ip addr |
After modifying the environment variable configuration, run the following command to start the Dify service.
1 | docker compose up -d |
Optional: Dify’s docker-compose.yaml file actually also includes an OceanBase container configuration. But since we’ve already completed the deployment via OceanBase Desktop, you can choose to comment out the OceanBase container configuration to avoid starting a redundant container.
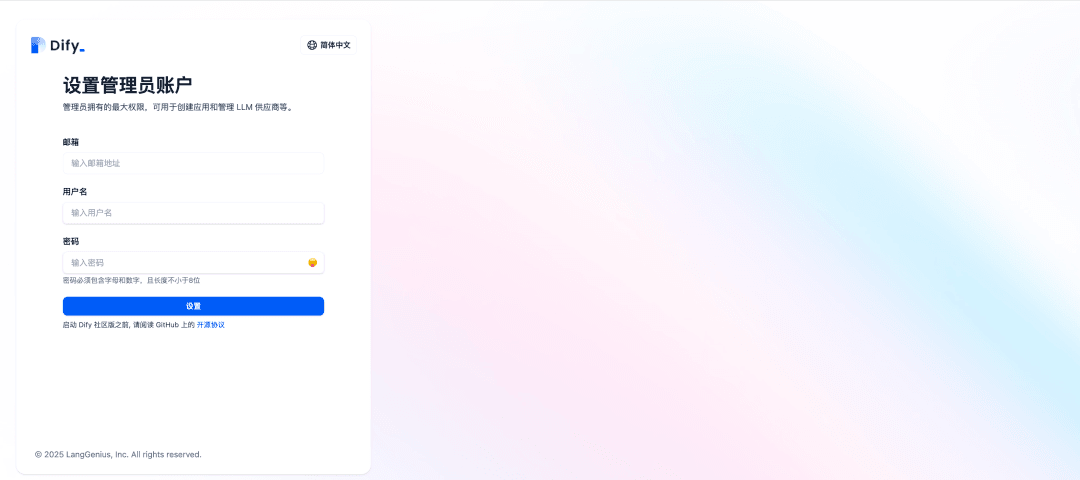
After the service starts, enter http://localhost in your browser to access Dify’s web interface. The first time you log in, you need to set a username and password.
Setting Up the Model Provider
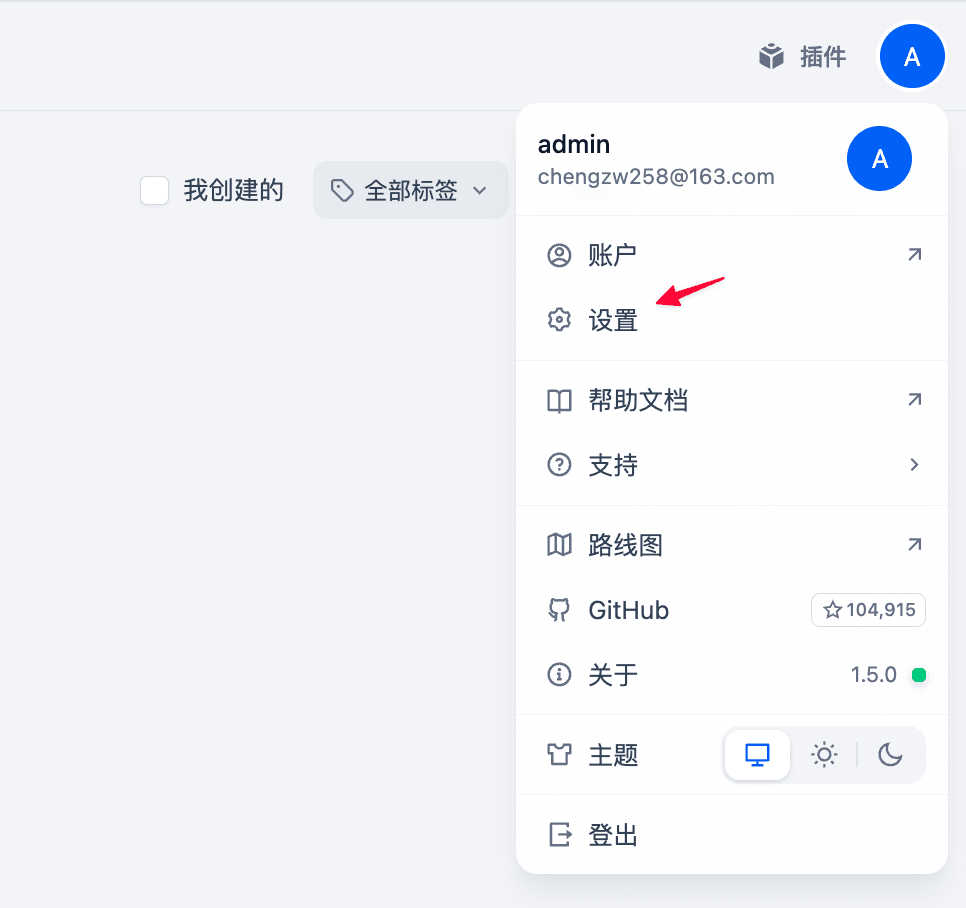
Click the avatar in the upper-right corner and select Settings to enter the settings page.
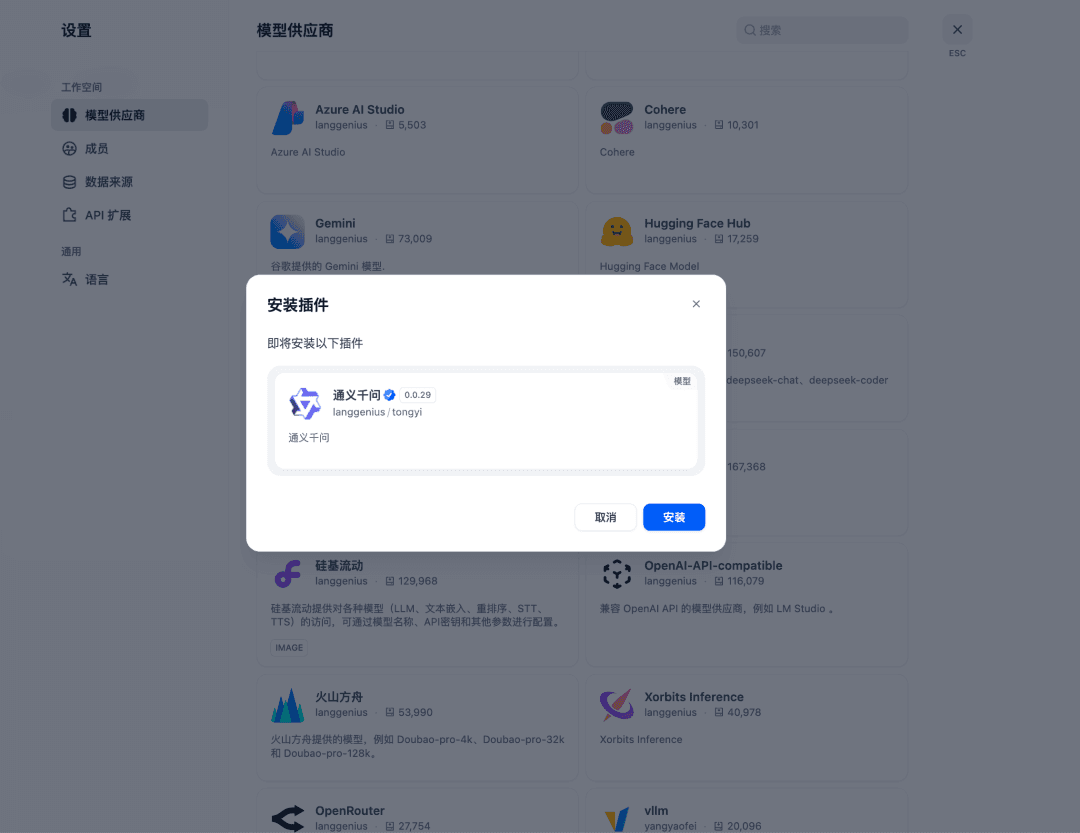
Click Model Provider; here I choose Tongyi Qianwen as the model provider. Readers can choose other model providers as they like.
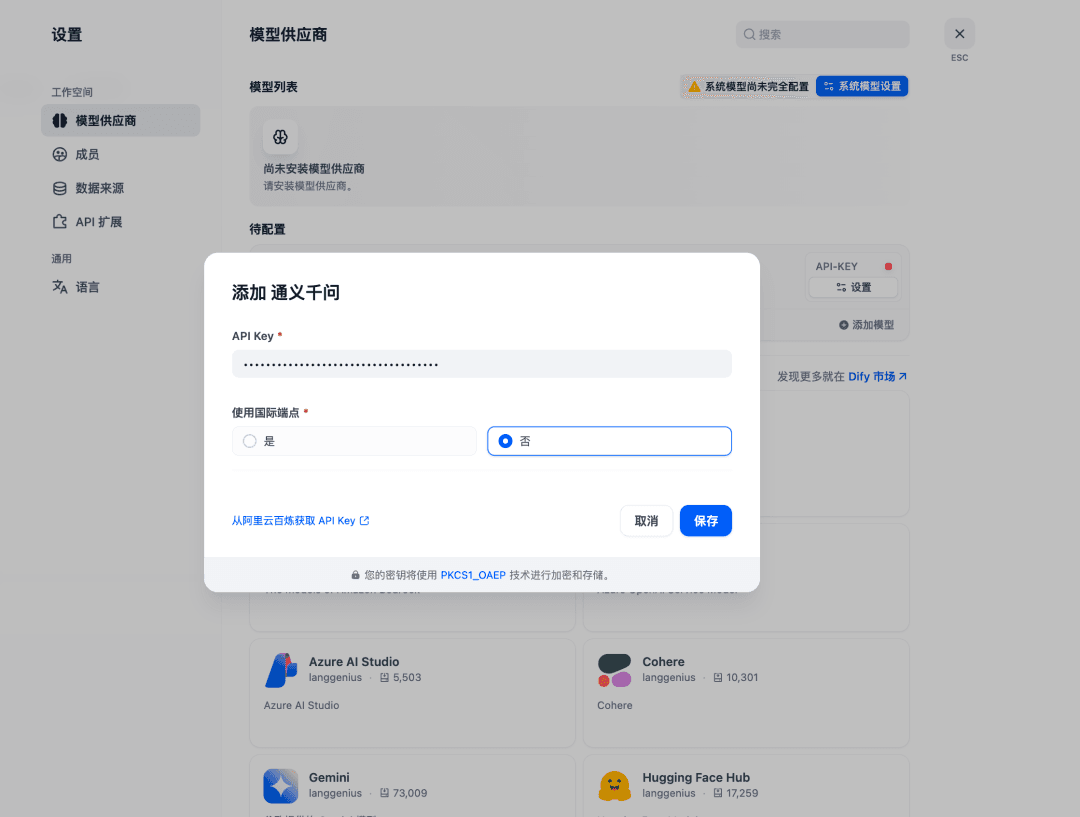
In the API Key field, enter Tongyi Qianwen’s API Key, then click Save.
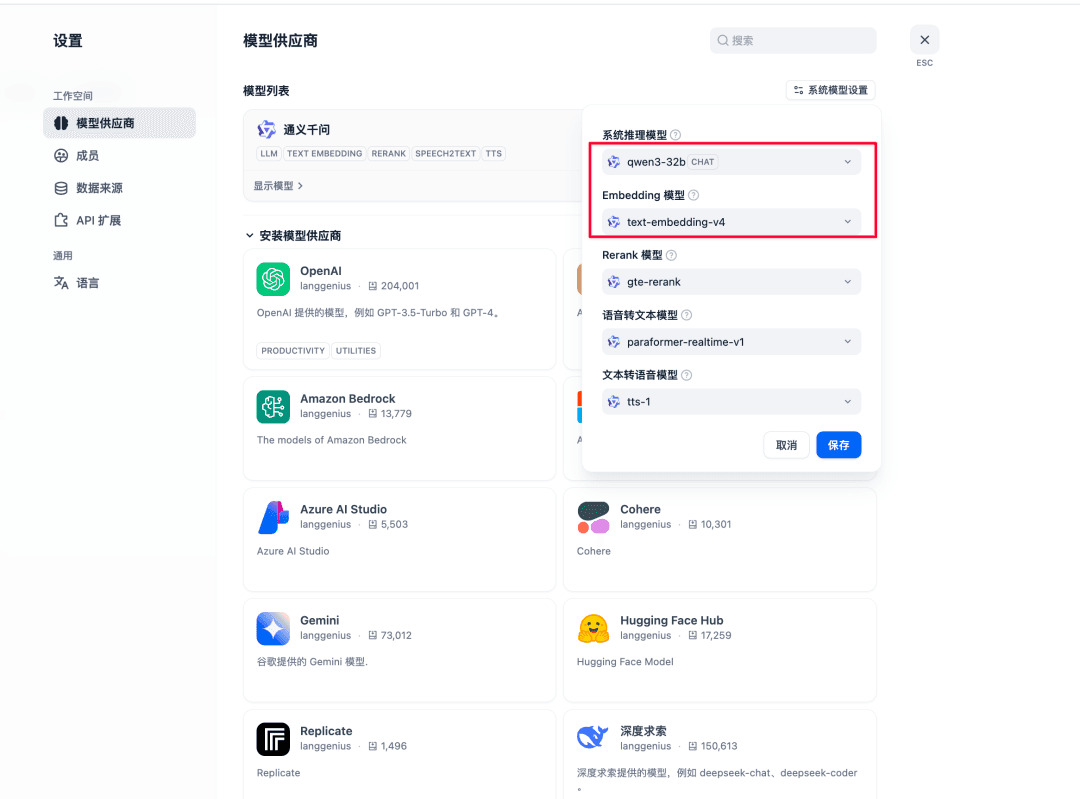
Select the default System Model. The main things to set here are the System Reasoning Model and the Embedding Model; you can choose according to your own preferences.
Indexing the Knowledge Base
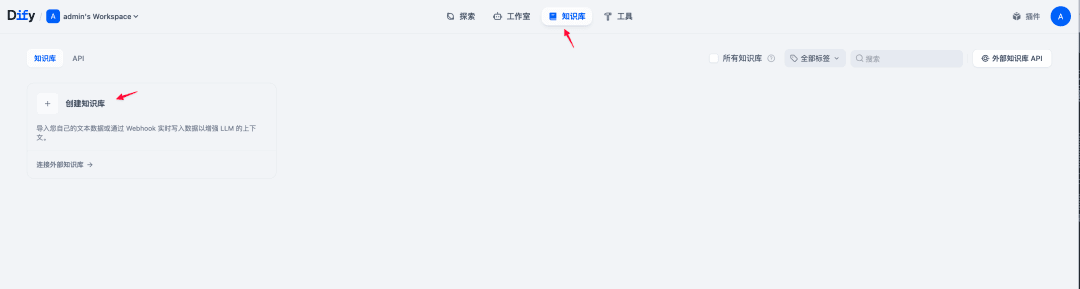
After completing the model setup, you can start indexing the knowledge base. Return to the home page, click the Knowledge tab at the top to enter the knowledge base management interface, and click Create Knowledge.
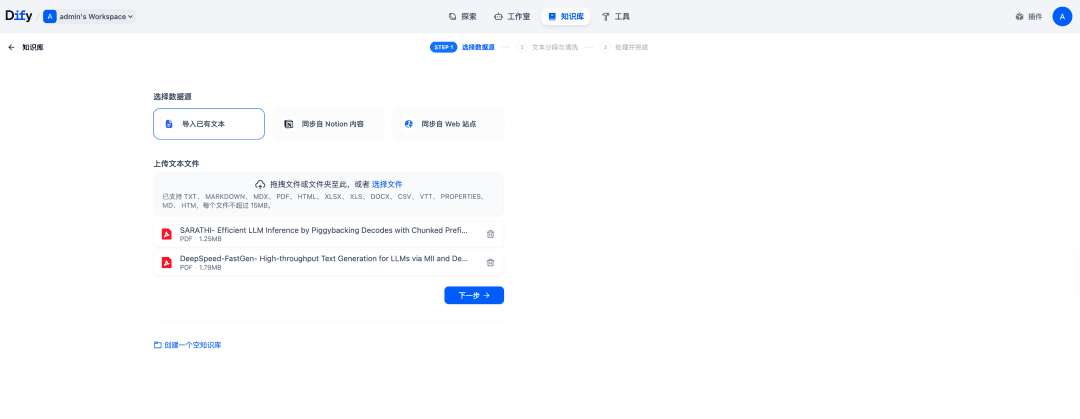
Select Import from existing text; you can drag files in directly to index them. Here I uploaded two papers about Chunked Prefill, a large-model inference optimization technique.
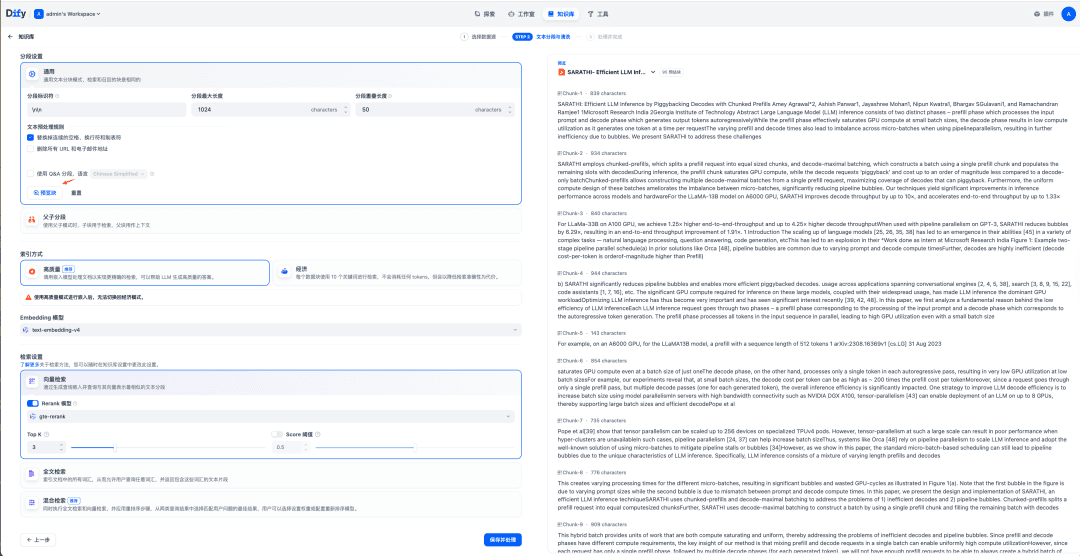
Then set the text chunking rules; you can keep the default settings here. Click Preview Chunks to preview the chunked results on the right. Once everything looks good, click Save & Process.
Creating a Chat Application
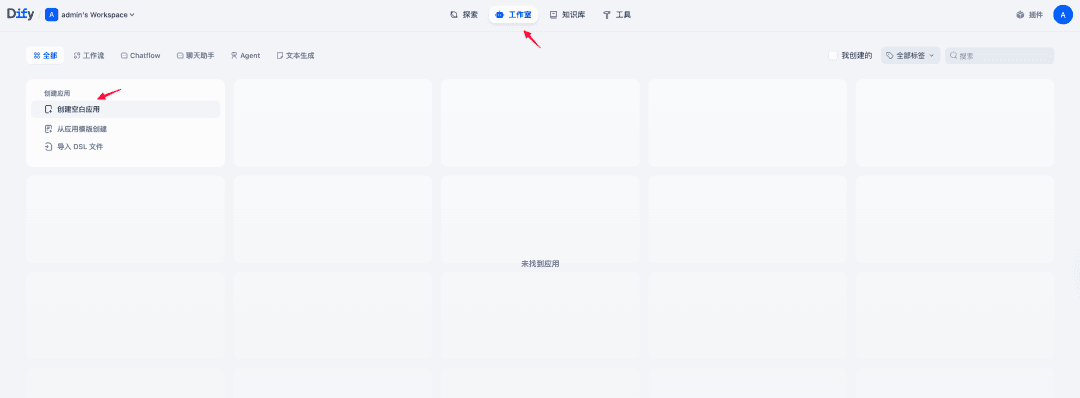
Click the Studio tab to enter the application management interface, then click Create from Blank.
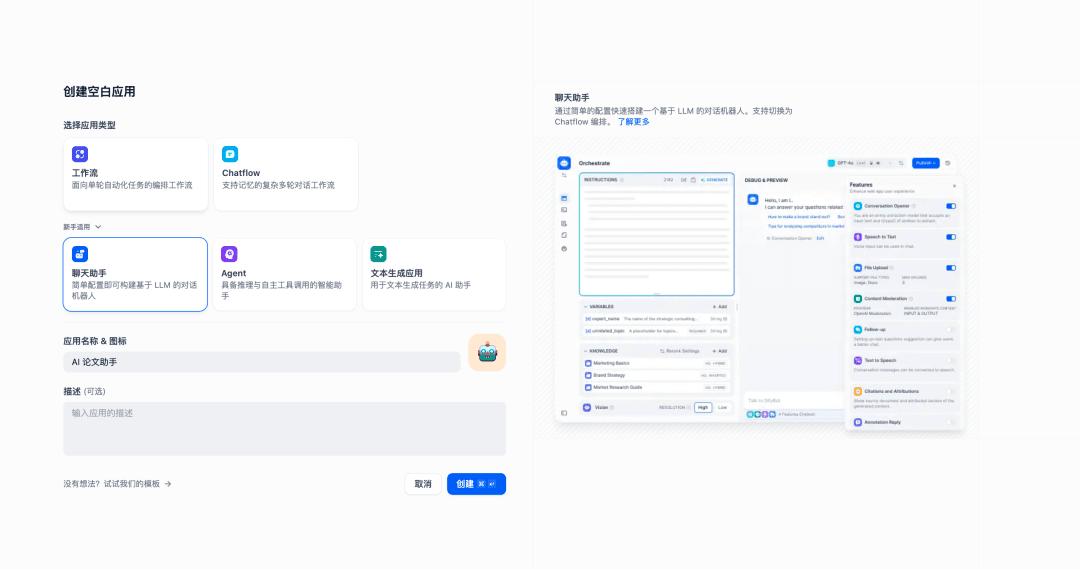
Select Chatbot and fill in the App Name. After entering it, click the Create button.
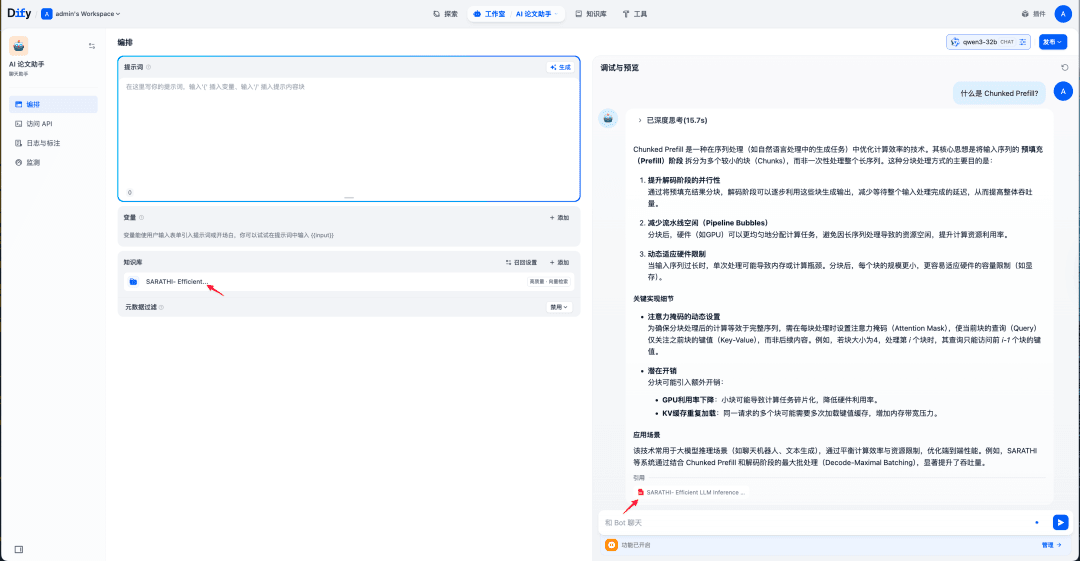
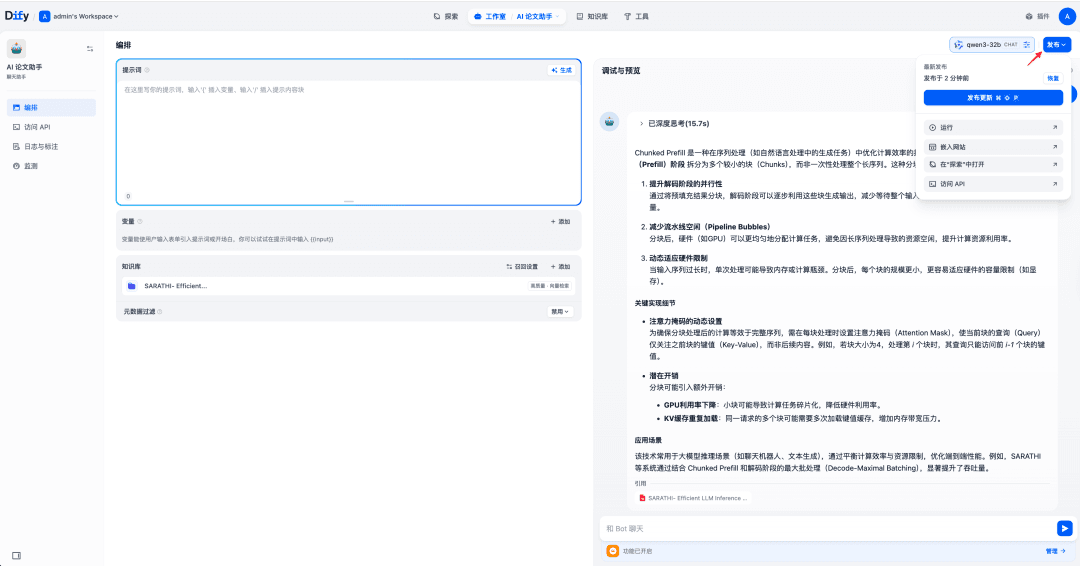
Add the knowledge base indexed in the previous step as the chat assistant’s context. You can then debug the application in the chat box on the right—for example, ask What is Chunked Prefill?. From the output, you can see that the AI generates an answer based on the document content, along with the cited source snippets.
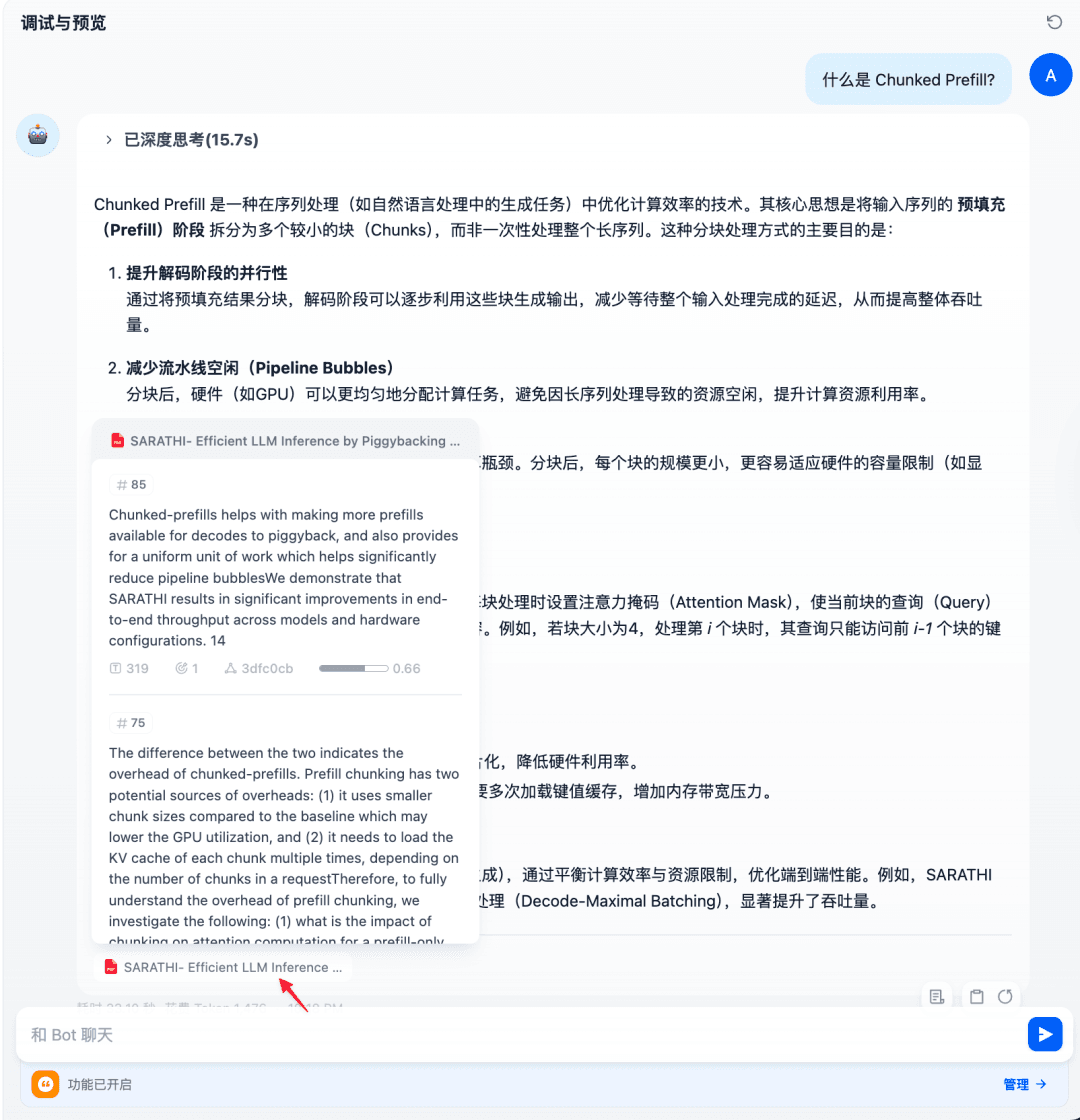
Click the file icon to see the specific cited content.
Once confirmed, click the Publish button in the upper-right corner.
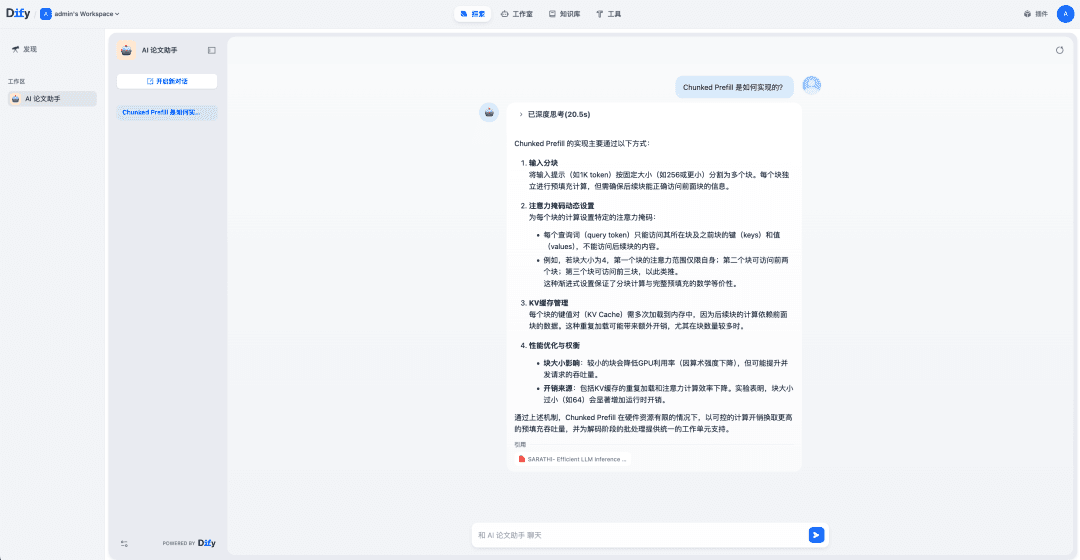
Then you can start asking questions in the chat assistant.
Turning the Dify Application Into an MCP Server
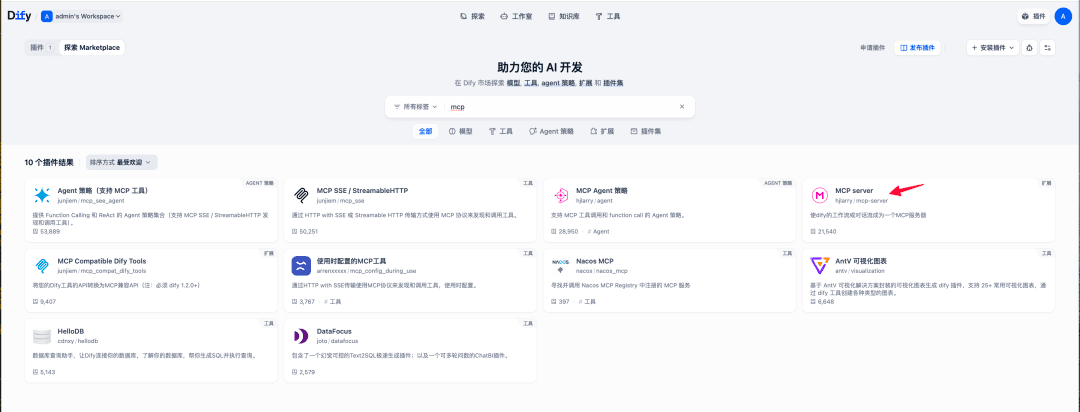
Dify can also act as an MCP Server, allowing the AI application you build to be called by other MCP clients (such as Cursor, Windsurf, and Cherry Studio), thereby expanding to more use cases. The mcp-server plugin is contributed by the Dify community and is an extension-type plugin. Once installed, it can turn any Dify application into a service endpoint that conforms to the MCP standard, for direct access by external MCP clients.
In Dify’s Marketplace, select the MCP server plugin to install it.
Next, set up the MCP Server, and for App select the chat assistant application you published in the previous step.
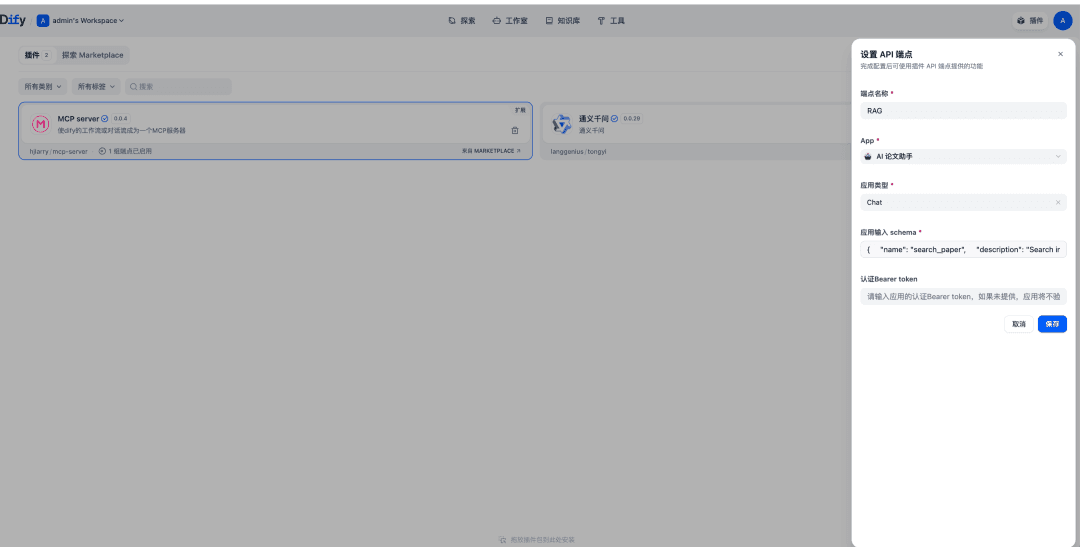
Per the MCP specification, we need to provide a clear input schema for the tool. For a chat-type Dify application, make sure the input schema includes a query field, in the following format:
1 | { |
After configuring the MCP Server, you’ll get an MCP Server endpoint. Dify provides two kinds of endpoints, SSE and Streamable HTTP; here we choose the Streamable HTTP endpoint with the /mcp suffix.
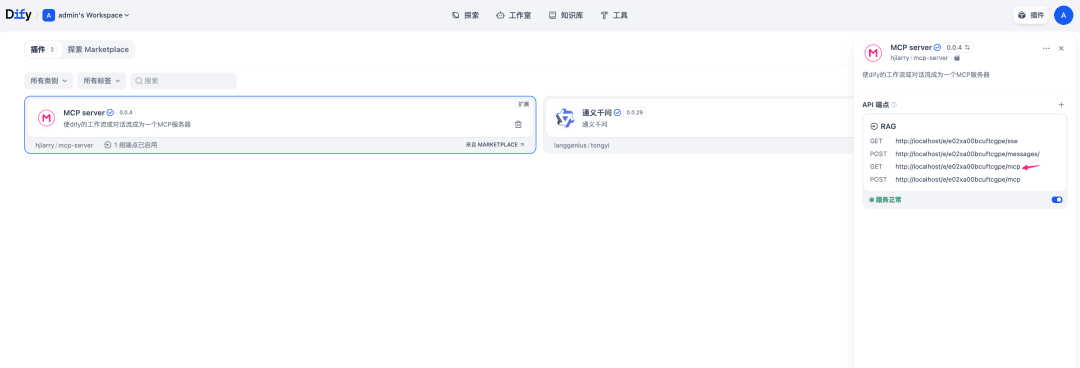
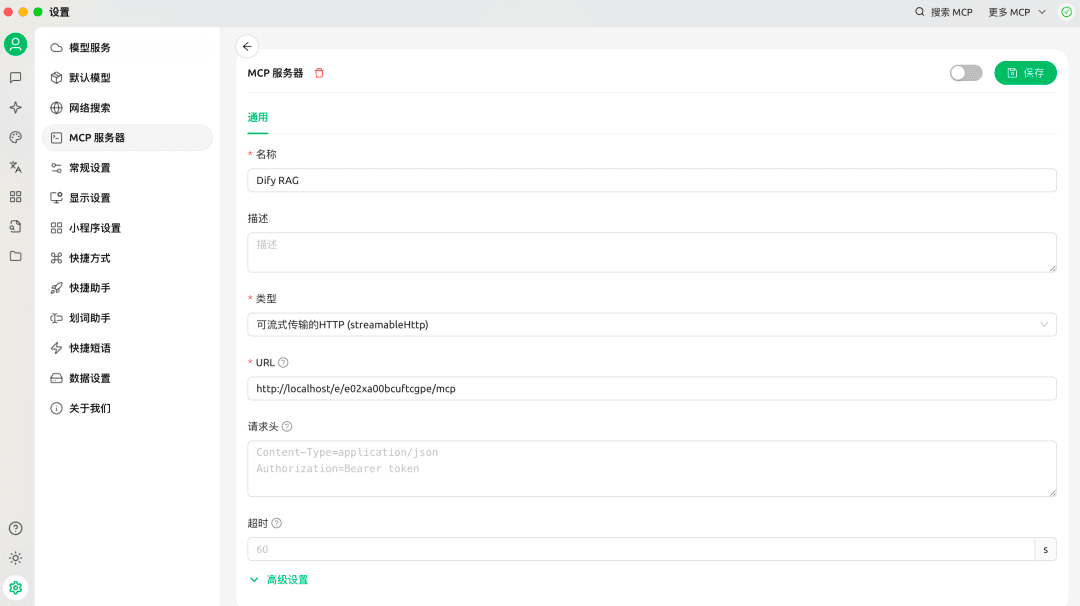
Copy the endpoint URL into the MCP Client; here I use Cherry Studio.
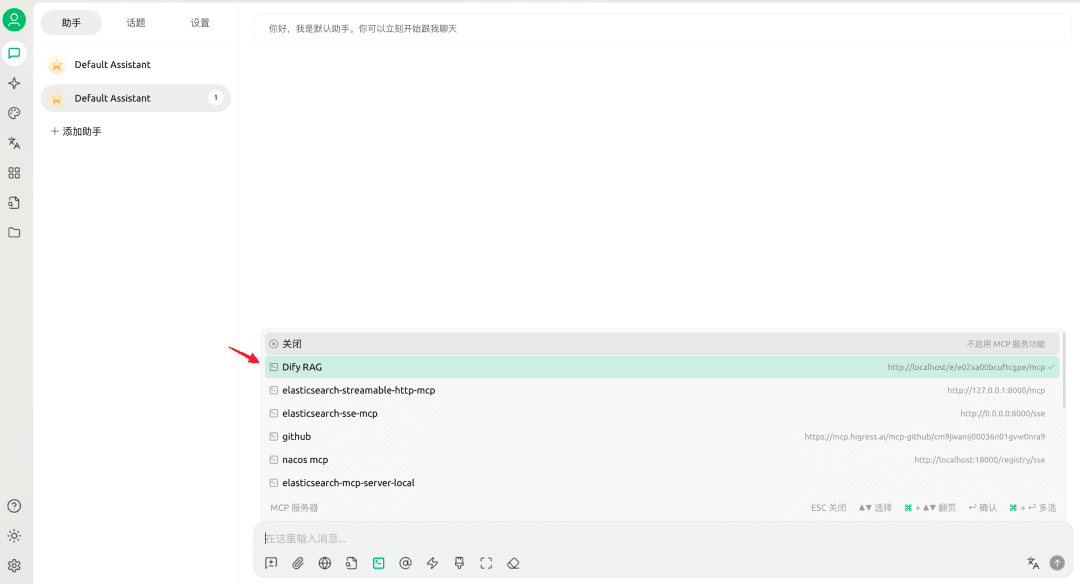
Once configured, select the Dify MCP Server you set up in the chat interface.
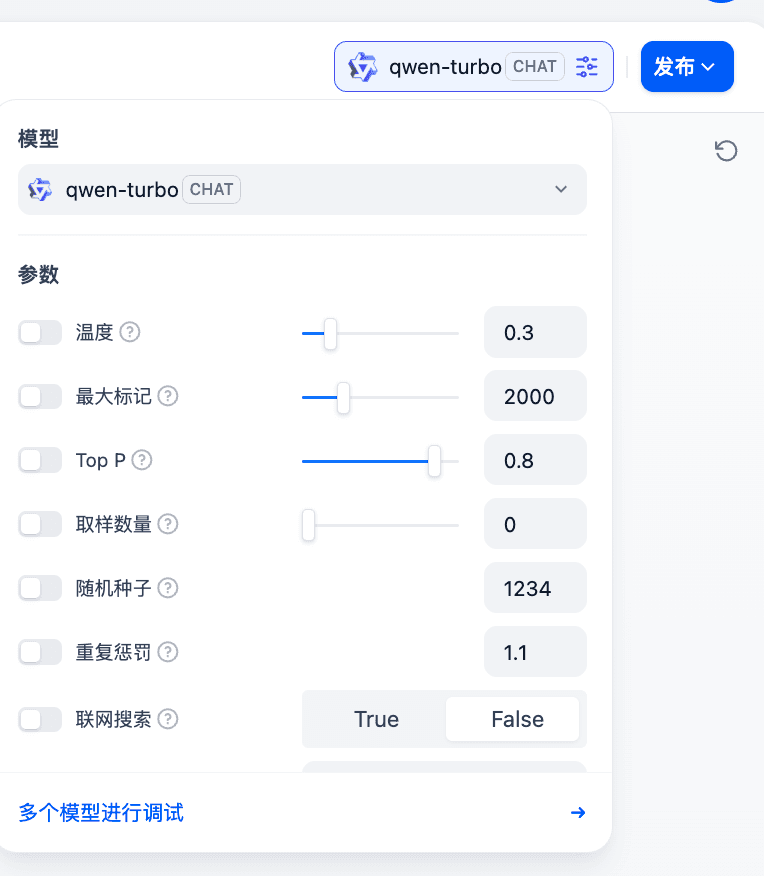
Next, we try asking a question related to the knowledge base content. But after calling the Dify MCP Server, we don’t get the expected answer; expanding the returned result, we can see that only <think> was returned. This is because the reasoning model I selected earlier, qwen3-32b, uses a hybrid thinking mode that allows Qwen3 to flexibly switch between “deep thinking” and “fast response” based on the user’s needs. It seems the model entered deep thinking mode, which prevented it from properly returning the Dify MCP Server’s call result.
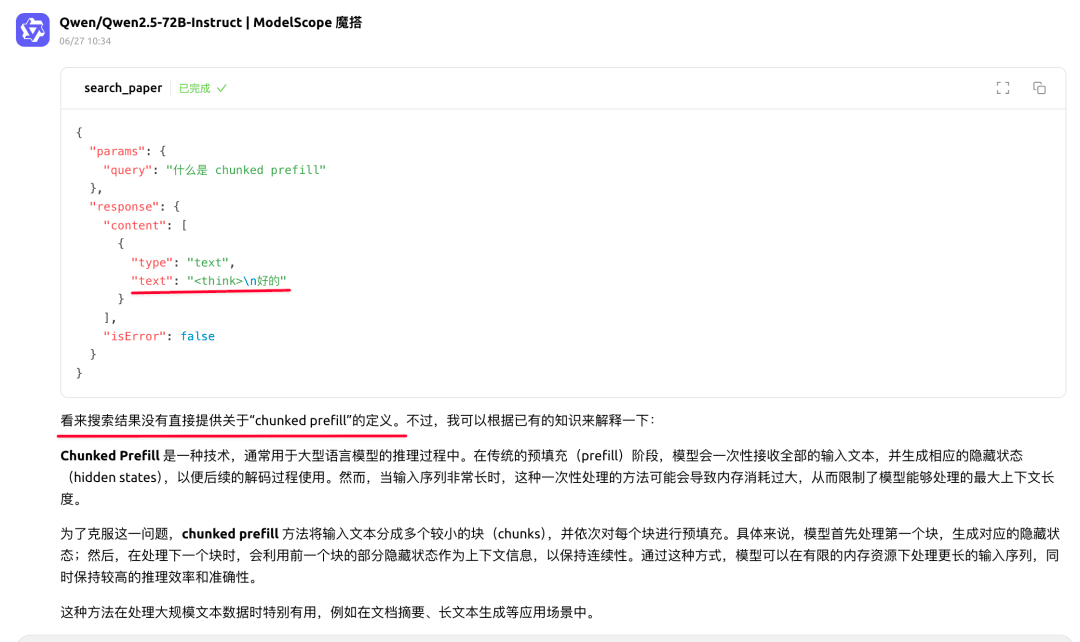
The solution is to switch the reasoning model to one without a deep thinking mode, such as qwen-turbo.
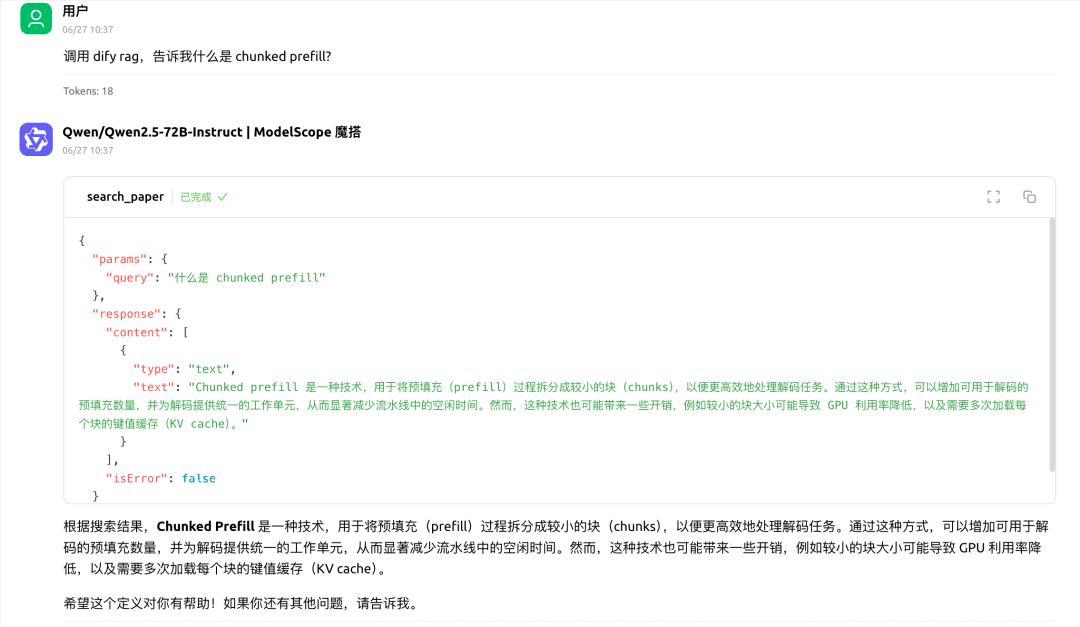
Now, asking a question related to the knowledge base content again, we get the expected answer from the Dify MCP Server.
Summary
This article explained in detail how to combine Dify, OceanBase, and MCP to build a fully functional RAG application from scratch. The tutorial covered the entire process—from deploying the environment and creating a knowledge base to building and debugging a chat assistant. Finally, the article also demonstrated how to turn a Dify application into a standard MCP Server so it can be called by external clients, greatly expanding the integration and collaboration capabilities of AI applications.
References
- Installing OceanBase Desktop
- MySQL Authentication Plugin Issues on macOS
- Dify MCP Plugin Hands-On Guide: Integrating Zapier for Effortless Agent Tool Calls
- Turn Your Dify App into an MCP Server
- Dify MCP server
If you appreciate the OceanBase open source community, give it a little star ✨! Every Star you give is the motivation behind our efforts~